
Imagine a marina operator in Moreton Bay waking up to find his pontoons’ shackles have rusted overnight. This is because they used standard hardware that couldn’t handle the salt and humidity. This problem happens all over Australia, costing businesses a lot and posing safety risks.
Your place by the sea or marine business faces the same issues. Whether it’s a commercial vessel, marina upkeep, or lifting gear in Brisbane’s ports, the right hardware is key. Salt, UV, and sand can quickly damage your equipment.
This guide explains why 316 stainless steel is better than regular hardware for fighting corrosion. You’ll learn how to keep your gear in top shape and when to get it checked by experts. Choosing the right hardware and maintaining it properly saves money and keeps everyone safe.
For advice on choosing the right chain or to book a test, call 07 3899 2933 today.
Hardware in Australia’s coastal areas battles constant corrosion, abrasion, and degradation. It faces a storm of environmental threats that break down materials. Marine-grade hardware is crucial because it withstands these unique coastal challenges.
Marine-grade hardware is not just better quality. It’s essential for survival in coastal environments. Coastal areas have extremely aggressive chemical conditions. Corrosion can quickly turn reliable equipment into hazards.
Brisbane’s subtropical climate makes saltwater exposure more aggressive than in cooler areas. Warm ocean temperatures increase seawater’s electrical conductivity, speeding up metal breakdown. Corrosion rates are two to three times faster than in temperate waters.
Chloride ions penetrate metal grain boundaries, causing corrosion from the inside out. These invaders weaken metal structures in unseen ways. Salt content in Australian waters varies, but brackish water can still cause significant damage.
Coastal corrosion is not just a surface problem. The real danger lies in the unseen deterioration happening within the metal structure, where chloride ions create pathways for accelerated breakdown that can compromise structural integrity long before visible rust appears.
Coastal hardware is attacked even when not directly immersed in water. Salt spray and air affect properties up to 5 miles inland. Brisbane’s sea breezes carry salt particles several kilometres from the coastline, affecting equipment considered “inland”.
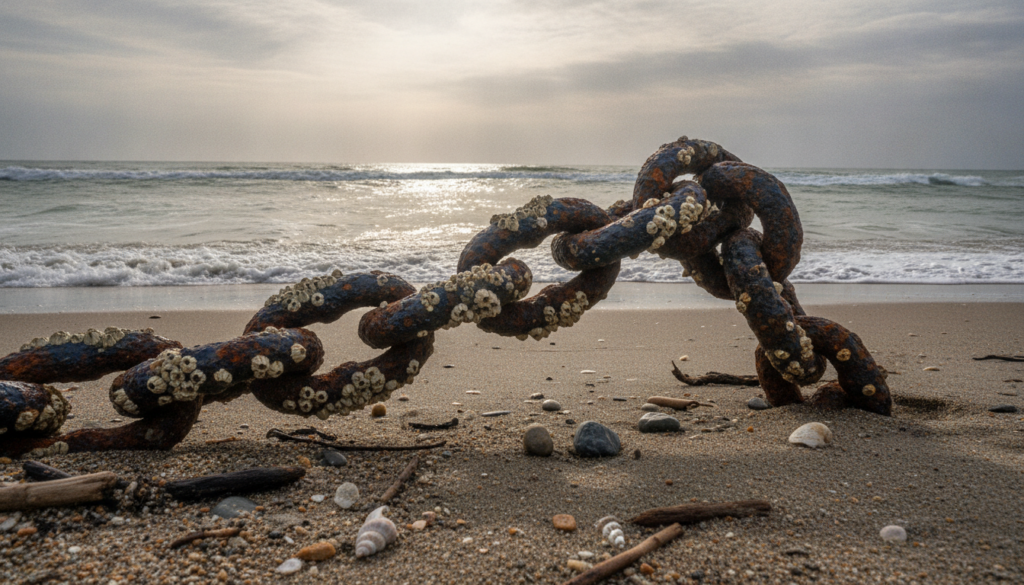
Australia receives intense UV radiation, breaking down protective coatings faster than in the northern hemisphere. UV index often exceeds 11 in Queensland during summer. This degrades paints, powder coatings, and polymers at accelerated rates.
Sand acts like nature’s sandpaper, constantly wearing away protection. Coastal winds carry abrasive particles that strike surfaces thousands of times daily. This mechanical wearing combines with chemical attack to create a devastating one-two punch.
The compounding effect creates a vicious cycle. UV radiation weakens coatings, making them brittle and prone to cracking. Sand abrasion then exploits these weaknesses, wearing through compromised areas to expose fresh metal. Once exposed, saltwater exposure begins the corrosion process, which further lifts and damages surrounding coating, expanding the vulnerable area exponentially.
Your equipment experiences this triple threat simultaneously, not sequentially. While UV rays degrade the top coating layers, sand particles wear through weak spots, and salt spray immediately attacks any exposed metal—all happening at the same time, all day, every day. This is why coastal hardware requires specification levels that might seem excessive to those unfamiliar with these unique Australian coastal conditions.
The initial price tag tells only a fraction of the real cost story. Choosing standard ferrous components for marine applications is a costly decision. Standard hardware in coastal environments typically fails within 1-3 years, compared to 10-20+ years for properly specified marine-grade alternatives.
Consider the real expenses you’ll face with inadequate hardware selection:
You might save $50 on a shackle today, but that same component failing could cost thousands in emergency repairs, lost time, and potential safety investigations. Marine corrosion doesn’t just create aesthetic problems—it compromises load-bearing capacity, threatens safety, and creates liability issues that far exceed any initial cost savings.
The hidden costs extend beyond direct replacement expenses. When coastal hardware fails unexpectedly, you face rush shipping charges, overtime labour costs, and the expense of temporary solutions while waiting for proper replacements. Equipment downtime in commercial maritime operations can cost hundreds or thousands of dollars per hour, making that initial hardware saving look insignificant by comparison.
Professional testing and certification requirements add another layer of cost when standard hardware fails. Any incident involving lifting equipment requires thorough inspection and recertification before returning to service. These regulatory requirements exist for good reason, but they represent additional expenses that proper marine-grade hardware selection would have prevented entirely.
Not all stainless steel is the same. Knowing the difference can save you money and keep you safe. Marine environments need special materials that can handle salt, moisture, and corrosion.
Choosing the right material for your needs is crucial. It protects your investment and keeps you safe.
For saltwater use, 316 stainless steel is the top choice. It has molybdenum, which fights corrosion well. This makes it perfect for areas exposed to salt and water.
316 stainless steel is strong and doesn’t corrode easily. It’s great for load-bearing parts. This is important for safety, like in crane load testing in Brisbane.
While it costs more, 316 stainless steel lasts longer. It’s best for areas with lots of salt. It’s reliable for harsh marine conditions.
304 stainless steel is strong but not as good against corrosion as marine-grade materials. It’s okay for freshwater or areas not exposed to salt. But, it’s not the best choice for marine use.
304 stainless steel corrodes when exposed to salt. Use it for areas not exposed to salt. It’s good for interior parts or places with little salt.

304 stainless steel lacks molybdenum, which is key for marine resistance. Avoid it for areas exposed to salt. The wrong choice can lead to failures and safety risks.
There are other materials for marine use. They offer different benefits depending on your needs. Knowing about these materials helps you solve marine hardware challenges.
Aluminium bronze is great for underwater use. It’s made of copper and is perfect for underwater parts. It resists marine life and is strong.
It’s good for areas where stainless steel might corrode. Its bronze makes it compatible with many marine metals. It lasts long underwater, saving you money.
Hot-dipped galvanised steel is a cost-effective choice for large structures. It has a zinc coating that protects the steel. It’s good for above-water structures.
But, it’s not for underwater use. The coating wears off with constant water exposure. Regular checks are needed to keep it working.
Duplex stainless steel is the best for harsh marine environments. It’s stronger than regular stainless steel and resists corrosion well. It’s perfect for offshore and high-stress areas.
It’s more expensive but worth it for safety. It’s lighter but still strong. It’s ideal for extreme conditions.
| Material Type | Corrosion Resistance | Strength Rating | Best Applications | Cost Factor |
|---|---|---|---|---|
| 316 Stainless Steel | Excellent in saltwater | High tensile strength | Deck hardware, shackles, cleats | Premium pricing |
| 304 Stainless Steel | Good in freshwater only | High tensile strength | Interior fittings, protected areas | Budget-friendly |
| Aluminium Bronze | Superior underwater | Moderate to high | Submerged components, propellers | Moderate premium |
| Galvanised Steel | Moderate atmospheric | Standard structural | Bollards, dock structures | Most economical |
| Duplex Stainless | Outstanding in all conditions | Nearly double 316 grade | Offshore, extreme environments | Highest investment |
Your choice depends on what you need and your budget. Each material has its own role in marine hardware. Choosing the right one means your equipment lasts longer and is safer.
Choosing the right marine hardware is crucial. It must handle Australia’s coastal challenges well. You can’t just pick any shackle or cleat without thinking. You need to consider several factors to ensure your hardware lasts safely for years.
When deciding, think about the load it needs to handle and the conditions it will face. Also, consider the cost now and the value over time. And, make sure different metals don’t harm each other. Each of these points is important for picking the right hardware, and ignoring any can lead to expensive failures.
The working load limit is the maximum weight your hardware should carry. It’s not the same as its breaking strength. Knowing this difference is key to safety.
Always stick to the rule of not exceeding 25% of the breaking strength for safe use. For example, a 4,000 kg shackle should only carry 1,000 kg. For risky operations, use even higher safety factors, like 5:1 or 6:1.
Quality hardware will have its load ratings clearly marked. These marks are not just for show; they’re vital for safety. If these marks wear off, get your gear checked by experts in Brisbane.
Think about the dynamic loads your hardware will face. Even seemingly stationary items like mooring cleats are subject to constant stress from waves. Add to this vibration and sudden loads from wind, and you’ll see why safety factors are so important.
Not all marine environments are the same. What you need for a permanently submerged anchor shackle is different from what you need for occasional splash exposure. Knowing your environment helps you avoid over- or under-specifying your hardware.
Brisbane’s coastal areas vary in their challenges. Vessels in Moreton Bay face strong tidal currents and UV, while equipment in warehouses near the port might just get salt-laden air. Understanding these differences helps you choose the right protection levels.
There are several exposure categories. The most aggressive is permanent submersion, requiring the highest-grade materials. The splash zone is next, followed by occasional wetting, and then atmospheric exposure. Each category has its own set of challenges.
| Exposure Category | Environmental Conditions | Minimum Recommended Material | Typical Brisbane Applications |
|---|---|---|---|
| Permanent Submersion | Continuous saltwater contact, marine growth, oxygen depletion | 316 stainless steel or superior | Anchor shackles, underwater hull fittings, submerged chains |
| Splash Zone | Regular wave impact, constant wetting and drying cycles, UV exposure | 316 stainless steel | Deck hardware, bow fittings, mooring cleats |
| Occasional Spray | Periodic saltwater contact, mostly dry conditions | 304 stainless steel or 316 grade | Cabin fittings, protected deck areas, covered hardware |
| Atmospheric Coastal | Salt-laden air without direct water contact | 304 stainless steel acceptable | Indoor marina storage, covered boat stands, workshop equipment |
Assessing your environment accurately helps you choose the right materials. Don’t underestimate the corrosive effect of salt air alone. Even hardware that never touches water can corrode quickly in coastal Queensland’s humid, salty atmosphere.
The cost of 316 stainless steel hardware can be high, which might make you consider cheaper options. But think about the long-term costs. A 316 stainless steel shackle might cost more upfront, but it could save you money in the long run.
One Brisbane marina operator saved 40% on maintenance by switching to 316 grade. This shows that while 316 stainless steel is more expensive, it can be more cost-effective in the long term.
Consider how long you expect your hardware to last. In harsh saltwater environments, 304 stainless steel might only last 2-3 years. But 316 grade could last 10-15 years or more. This makes the higher upfront cost worth it.
Remember, failing hardware can cause more problems than just the initial cost. A corroded shackle can damage your vessel, hurt people, or lead to expensive insurance claims. Choosing hardware with enough safety factors is crucial for protecting your investment and everyone on board.
Galvanic corrosion is a major cause of hardware failure. It happens when different metals touch each other in saltwater. This creates a chemical reaction that can quickly damage the less noble metal.
Seeing the damage from galvanic corrosion is common, even if you don’t know what’s causing it. Steel screws can corrode inside aluminium fittings, or zinc anodes can dissolve too quickly. This can destroy hardware in months that should last years. It’s important to understand which metals can be paired safely.
The galvanic series ranks metals by their electrical potential in seawater. Metals far apart on this series create stronger galvanic cells and more aggressive corrosion. Pairing stainless steel (noble) with zinc or aluminium (active) creates problematic combinations unless you take preventive measures.
Preventing galvanic corrosion starts with careful material pairing. Use hardware and fasteners from the same alloy family whenever possible. If you must connect dissimilar metals, use non-conductive barriers like plastic or rubber washers to prevent direct contact.
Another effective approach is using sacrificial anodes. These less-noble metals corrode preferentially, protecting your valuable hardware. You’ll often see zinc or aluminium anodes on vessels and offshore structures for this reason. Regularly inspect and replace these anodes is key to any maintenance routine.
Be careful with threaded connections, as galvanic corrosion can cause them to seize. Stainless steel bolts threaded into aluminium or bronze components often become impossible to remove after saltwater exposure. Anti-seize compounds can help, but complete isolation is the best protection.
The working load limits you calculated can be compromised by galvanic corrosion that eats away at connection points. This hidden degradation often occurs in crevices and threads where inspection is difficult. That’s why getting your gear checked by experts in Brisbane is essential for ensuring safety.
Remember, galvanic corrosion accelerates in proportion to the surface area ratio between metals. A small steel fastener in a large aluminium plate corrodes much faster than a large steel component with small aluminium fittings. This principle should guide your design decisions when specifying mixed-metal assemblies.
Choosing marine hardware is not a simple task. Each application has its own needs. You must pick the right hardware for your job, whether it’s for sailing, mooring, or deck fittings. The wrong choice can lead to equipment failure, safety hazards, and expensive repairs.
Your marine environment poses unique challenges. Standard hardware can’t handle the constant salt spray and dynamic loads during rough weather. Understanding each hardware category helps you make informed choices that balance performance, durability, and cost.
Shackles are key in marine connections, linking anchor lines, rigging, and lifting points. You’ll find two main types: bow shackles and dee shackles. Bow shackles have a wider shape for multiple connections, while dee shackles are narrower for inline loads.
The closure mechanism is crucial for performance and security. Screw-pin shackles are easy to remove and adjust, great for changing connections. Bolt-type shackles with captive pins offer better security for permanent use and critical lifting.
Load orientation is vital when using shackles. Side-loading can reduce a shackle’s strength by 50% or more, posing a risk. Always ensure loads pull straight through the pin axis for maximum safety.
For lifting, your shackles must have current certification. These marks prove the hardware meets Australian Standards for safe loads. Never use uncertified shackles for overhead lifting or critical connections.
“The difference between rated and unrated shackles isn’t just paperwork—it’s the difference between equipment you can trust with your life and equipment that might fail when you need it most.”
Turnbuckles and rigging screws adjust tension in standing rigging and lifelines. It’s crucial to match the turnbuckle to the wire rope or rod it connects. Using undersized turnbuckles can create dangerous weak points in your rigging.
Closed-body turnbuckles offer better corrosion protection than open types. The enclosed barrel prevents salt and debris from entering, extending service life in marine environments. While open turnbuckles are cheaper, closed-body designs offer better value through reduced maintenance.
Calculate the adjustment range needed before buying. Your turnbuckle should provide enough travel for initial tension and future adjustments. A good rule of thumb is to have at least 25mm of adjustment range after initial tensioning.
| Turnbuckle Type | Best Applications | Corrosion Resistance | Adjustment Visibility |
|---|---|---|---|
| Open Body | Budget installations, easy inspection needed | Moderate (requires frequent maintenance) | Excellent (threads visible) |
| Closed Body | Standing rigging, permanent installations | Excellent (sealed against elements) | Limited (requires marking) |
| Swage Type | Racing applications, weight-critical setups | Very Good (316 stainless construction) | Good (streamlined design) |
| Jaw and Eye | Lifelines, safety rails | Good (depends on grade) | Excellent (open configuration) |
Proper installation requires equal thread engagement on both ends. Count the threads showing beyond each fitting—they should match within one or two threads. For critical applications, use locking wire or pins to prevent loosening from vibration and load cycling.
Mooring equipment selection starts with understanding your vessel’s loads. Your cleats must be sized right for your mooring lines—the 3:1 length-to-rope-diameter rule is a good starting point. A 20mm diameter line needs a 60mm long cleat for secure wrapping.
Cleat styles serve different purposes on your vessel. Horn cleats offer versatile line-handling options, allowing multiple wrapping patterns for various conditions. Open-base cleats are easy to install with through-bolt mounting, while closed-base designs provide a cleaner look with surface mounting. Pop-up cleats are good when you want a flush deck surface for safety and looks when not mooring.
Mounting technique is as important as hardware selection. Through-deck installations need backing plates to spread loads, preventing deck damage. The backing plate should extend at least 25mm beyond the fastener pattern in all directions.
Consider the angle of pull when positioning your mooring equipment. Loads applied at extreme angles create higher stress concentrations and can pull cleats off their mounts. Position cleats so mooring lines pull roughly parallel to the deck surface, ideally within 15 degrees of horizontal.
Wire rope and chain selection depends on your specific application needs. Stainless steel wire rope offers excellent corrosion resistance and a clean look, making it ideal for standing rigging and lifelines. Galvanised wire rope is cheaper and works well for running rigging and anchor rodes where looks matter less.
Chain grades make a big difference in strength and durability. Proof coil chain is good for general mooring and anchoring with enough strength at a reasonable cost. High-test chain has 50% more strength than proof coil in the same size, reducing weight and storage needs. For critical lifting, alloy chain provides the highest strength-to-weight ratio.
Every chain used for lifting must have grade markings and proof testing documentation. These markings show the manufacturer, chain grade, and working load limit. Without proper identification, you can’t verify the chain meets safety standards or determine the right working loads.
Connecting hardware for wire rope and chain needs careful matching. Shackles, thimbles, and swivels must equal or exceed the breaking strength of the rope or chain they connect. Using undersized connectors can create failure points, defeating the purpose of using high-strength primary components.
Marine fasteners are often overlooked in hardware selection. Investing in premium 316-grade shackles and fittings but using inferior fasteners for mounting is penny-wise but pound-foolish. This approach leads to corrosion, structural failure, and safety hazards.
Quality marine fasteners cost more but offer crucial advantages. Better corrosion resistance means longer service life with less maintenance. Proper threading ensures secure connections that won’t loosen under vibration and load cycling. Matching fastener grade to hardware grade maintains structural integrity across the entire assembly.
Stainless steel fasteners need special handling to prevent galling—a form of cold welding where threads seize together. Always use marine-grade anti-seize compound on stainless fasteners, specially when threading into stainless steel components. This simple step prevents the frustration of frozen fasteners during future maintenance.
Your fastener selection should match or exceed the grade of the hardware it secures. Installing 316-grade deck hardware with 304-grade bolts creates a weak point where corrosion will concentrate. Use 316 stainless marine fasteners wherever possible, and apply marine-grade sealant around holes to prevent water intrusion.
Avoid mixing metals without proper isolation. Stainless steel bolts threaded directly into aluminium create galvanic corrosion that rapidly destroys the aluminium. Use plastic or rubber washers as barriers, or choose fasteners with integrated isolation sleeves designed for dissimilar metal connections.
“The failure of a single cheap bolt can compromise an entire system of premium marine hardware. Your fasteners deserve the same careful selection as your shackles and fittings.”
Your marine hardware faces constant attacks from salt, sun, and sea. But, a good maintenance routine can greatly extend its life. You don’t need to spend hours or buy expensive products. What’s needed is consistency and attention to detail.
Keeping your hardware in top shape for years can be simple. Just follow these five essential steps. This will protect your investment and keep your equipment safe and working well for decades.
How often you inspect your marine equipment depends on how much you use it. Commercial users should check their gear daily. Recreational boaters should inspect every two weeks during busy seasons.
If your boat or equipment is stored for a long time, inspect it at least once a month. This stops small problems from becoming big ones. For critical gear like height safety equipment, professional checks might be needed more often.
Look for signs of trouble during inspections. Check for discoloration that means corrosion is starting. Also, check if mounting points are loose or if threads are damaged.
High-stress areas like cleats and hinges wear out faster. Keep an eye on these. Take photos of what you find. This helps you spot problems early.
Rinsing with fresh water is the best way to stop corrosion. Salt left on metal attracts moisture and speeds up corrosion. This is true even for high-quality 316 stainless steel.
After being in saltwater, rinse your hardware well with fresh water. Use enough pressure to clean crevices but not too much. Pay special attention to threaded parts where salt builds up.
Don’t forget hinges and swivels where salt can get trapped. A quick rinse can make your hardware last three times longer than if it’s not cleaned.
For boats in the water, rinse hardware weekly. For gear taken out of saltwater, rinse it right away before the salt dries. This simple step is very effective and costs nothing.
Cleaning right removes corrosion without harming your hardware’s finish. Never use rough scrubbing pads on stainless steel. They scratch the surface and remove the protective layer. Use soft cloths or non-abrasive sponges instead.
Choose cleaners that are pH-neutral and made for marine use. Harsh acids or strong alkalis can damage your gear. Many household cleaners contain chlorides that make corrosion worse.
For tough salt deposits, soak the hardware in fresh water for 15-20 minutes before cleaning. This dissolves the salt without needing to scrub. If you see brown discoloration on stainless steel, it’s usually just cosmetic. It shows oxidation but doesn’t weaken the metal.
For serious corrosion, use a stainless steel cleaner and polish. Apply it with a soft cloth, following the metal grain if you can see it. Rinse well after cleaning to remove all residue.
| Usage Intensity | Inspection Frequency | Fresh Water Rinse | Deep Cleaning | Lubrication Schedule |
|---|---|---|---|---|
| Commercial Daily Use | Daily visual checks, weekly detailed inspection | After every shift or exposure | Monthly with marine-safe products | Weekly for moving parts, monthly for threads |
| Active Recreational (Weekly) | Every two weeks during season | After each outing | Monthly during active season | Monthly for hinges and swivels |
| Occasional Use (Monthly) | Monthly minimum | After each use | Quarterly or seasonally | Every 3 months or before use |
| Storage/Seasonal | Before storage, monthly during storage, before reactivation | Before storage | Before storage and after | Before storage with protective coatings |
The right lubricants and coatings protect against salt and moisture. For hinges and swivels, use silicone-based marine spray lubricants. They resist washout better than petroleum-based oils and don’t attract dirt.
For high-load fittings like turnbuckles, use Teflon-based lubricants. They provide excellent protection under pressure. Apply these products sparingly—excess lubricant attracts contaminants that can accelerate wear.
Anti-seize compound is key for stainless steel threads. Stainless steel can gall (cold weld) when threaded connections are under load. A thin coating of marine-grade anti-seize compound prevents this and makes disassembly easier.
Be careful with protective coatings on some hardware. Applied wrong, they can trap moisture and speed up corrosion. Only use coatings made for marine use, and make sure surfaces are clean and dry before applying.
Reapply lubricants and coatings as needed. Heavy-use equipment needs monthly reapplication. Stored equipment should be treated before storage and checked periodically.
Keeping maintenance records might seem tedious, but it’s very valuable. Create a simple log that records the date, what you inspected, and what maintenance you did. Take digital photos of hardware condition to track deterioration over time.
This documentation helps you spot patterns and trends. It meets regulatory needs for commercial and professional use. It also supports warranty claims if hardware fails early.
Your records are important for insurance claims if equipment fails. Store your records safely—digital backups protect against loss if paper logs are damaged or destroyed.
Small mistakes in how you install and care for marine hardware can lead to expensive failures and dangerous situations. Understanding these common errors helps you avoid costly replacements and keeps your equipment operating safely for years. Let’s explore the most frequent maintenance mistakes that compromise even high-quality marine-grade components.
Connecting different metals without proper isolation is a damaging mistake. When dissimilar metals touch in saltwater, they create a galvanic cell that accelerates corrosion on the less noble metal.
For example, steel screws in aluminium fittings can cause rapid corrosion. The aluminium corrodes quickly, while the steel remains relatively unaffected. This can destroy fittings within months in harsh marine environments.
Stainless steel bolts paired with aluminium backing plates also create a problem. The voltage difference between these metals drives the corrosion process, eating away the aluminium and compromising structural integrity.
To prevent galvanic corrosion, create a barrier between incompatible metals. Use isolation washers made from nylon or other non-conductive materials between different metal components. Apply marine-grade sealants that prevent moisture from bridging the gap between dissimilar metals.
Another effective solution involves using sacrificial zinc anodes strategically placed to protect more valuable hardware. The zinc corrodes preferentially, protecting your stainless steel and aluminium components from damage.
| Metal Combination | Corrosion Risk | Prevention Method | Inspection Frequency |
|---|---|---|---|
| Stainless steel with aluminium | Very High | Isolation washers and marine sealant | Monthly |
| Zinc-plated steel with stainless | High | Barrier coating or zinc replacement | Quarterly |
| Bronze with stainless steel | Low to Moderate | Regular rinsing and lubrication | Every 6 months |
| Galvanised steel with aluminium | Moderate to High | Non-conductive barrier required | Bi-monthly |
When your equipment undergoes lifting equipment testing brisbane certification, inspectors check for signs of galvanic corrosion. Addressing metal compatibility issues before they cause hardware failure saves you from failed inspections and equipment downtime.
Many people believe that tighter is always better when securing marine hardware. This misconception leads to stripped threads, crushed gaskets, and stress concentrations that become crack initiation points.
Excessive torque permanently damages threads, specially in softer materials like aluminium and brass. Once threads strip, the fastener loses its holding power and requires expensive repairs or complete replacement of the component.
Over-tightening also crushes gaskets and seals beyond their recovery point. These compressed seals no longer provide proper weatherproofing, allowing moisture and salt to penetrate and accelerate corrosion.
The solution involves using proper torque specifications for each type of fastener and material combination. A calibrated torque wrench ensures you achieve the manufacturer’s recommended tightness without exceeding safe limits.
Vibration and thermal expansion cause fasteners to loosen over time. Using lock washers or marine-grade thread locker prevents this loosening without requiring excessive initial torque. These products maintain proper tension while allowing for controlled removal when maintenance is needed.
Proper torque isn’t about maximum tightness—it’s about achieving the optimal clamping force that secures the connection without damaging the materials.
The “out of sight, out of mind” approach to marine equipment care causes many hardware failures. Components you can’t easily see often suffer the worst corrosion because they’re excluded from regular maintenance routines.
Through-deck fasteners beneath deck plates sit in environments where moisture accumulates. These hidden bolts and backing plates corrode silently until structural failure occurs. By the time you notice problems, significant damage has already happened.
Hardware in bilge areas faces continuous exposure to standing water mixed with fuel, oil, and other contaminants. This harsh environment accelerates corrosion far beyond what you’d see on exposed surfaces.
Backing plates in enclosed spaces behind bulkheads or within voids create another maintenance blind spot. These critical structural components support loads but rarely receive inspection or maintenance attention.
Creating a comprehensive inspection plan that includes hidden hardware protects you from unexpected failures. Document the location of all concealed fasteners and fittings when installing equipment. Schedule regular inspection intervals that include removing deck plates and access panels.
Professional maintenance services use borescopes and inspection cameras to check concealed areas without complete disassembly. This technology reveals corrosion and damage before it compromises your equipment’s safety or performance.
Strong cleaning products might remove salt and grime effectively, but they often damage the protective coatings that prevent corrosion. This seemingly helpful maintenance actually accelerates hardware failure rather than preventing it.
Strong acids etch the passive oxide layer on stainless steel surfaces. This protective layer naturally forms on stainless steel and provides its corrosion resistance. Once damaged, the steel becomes vulnerable to pitting and crevice corrosion.
Aggressive solvents attack rubber seals, plastic components, and painted surfaces. These chemicals cause seals to swell, crack, or lose their flexibility, compromising weatherproofing and allowing moisture penetration.
Abrasive cleaners and wire brushes create microscopic scratches in protective finishes. These scratches become corrosion initiation sites where rust can take hold and spread beneath the coating.
Safe marine equipment care requires using pH-neutral cleaners specific to saltwater environments. These products effectively remove contaminants without damaging protective layers or compromising material integrity.
Fresh water remains your best cleaning tool for routine maintenance. A thorough rinse after every saltwater exposure removes most corrosive salts without any risk to protective coatings. For stubborn deposits, mild detergent solutions provide additional cleaning power safely.
When you need stronger cleaning action, test products on inconspicuous areas first. This precaution helps you identify potential damage before applying chemicals to visible or critical components.
Understanding these common maintenance mistakes transforms your approach to marine hardware care. Avoiding these errors extends equipment life, reduces replacement costs, and maintains the safety margins that proper function depends on. Combined with regular professional inspections, mistake-free maintenance ensures your hardware performs reliably in demanding marine environments.
Certified testing by experts protects your equipment, crew, and meets safety standards. Regular cleaning and inspections are good, but professional testing is essential. It checks the equipment’s strength and safety.
Professional testing finds problems that can’t be seen. This is crucial in marine environments where salt corrosion is a silent threat. It ensures your equipment is safe when you need it most.
How often you need inspections depends on your environment and usage. Marine areas need more checks because salt water causes hidden damage faster. Australian laws require regular testing to avoid big fines.
Just looking at your equipment isn’t enough. Hidden problems like cracks or corrosion can cause big failures. Experts use special tools to find these issues before they become major problems.
These specialized testing methods include:
Regular testing proves you’re keeping your equipment safe. This proof is key during safety checks and protects you legally. It also makes insurance companies happy.
Load testing covers more than just cranes. It checks your entire lifting system, from the crane hook to the smallest shackle. Experts test every part that carries a load.
Proof load testing checks if your equipment can handle more than usual. This ensures it’s safe for the expected stresses. Testers apply 125% to 150% of the usual load, depending on the item and standards.
During testing, experts look for any permanent damage. If something bends or stretches, it’s failed and needs to be replaced. This shows the material can’t handle the rated loads anymore.
Non-destructive tests also check the equipment’s condition without damaging it. These tests, along with load testing, give a full picture of your equipment’s state and how long it will last.
Testing services provide detailed reports. These include:
Testing in salt spray chambers checks if your equipment can resist corrosion. This is vital for marine use. Equipment that passes these tests shows it meets the needed standards.
Testing follows Australian standards based on international best practices. Knowing these rules helps you stay compliant and plan your testing. Different equipment needs different testing frequencies based on risk.
High-risk equipment must be tested at least once a year. Marine environments might need more frequent checks because of faster corrosion. Your testing schedule should match your actual use, not just the minimum required.
The following table outlines standard testing frequencies for common marine hardware:
| Equipment Type | Standard Testing Interval | Marine Environment Interval | Applicable Standards |
|---|---|---|---|
| Lifting chains and slings | 12 months | 6 months | AS 2759, AS 1666 |
| Shackles and connectors | 12 months | 6 months | AS 2741 |
| Wire rope and fittings | 12 months | 6-9 months | AS 3569, AS 2550 |
| Lifting beams and spreaders | 12 months | 12 months | AS 4991 |
| Crane hooks and blocks | 12 months | 6 months | AS 2550 |
Keeping detailed records of your inspections is crucial. These records show when and how your equipment was tested. They must be kept for several years for audits and legal reasons.
Professional services align your records with local and international standards. This ensures your equipment meets all necessary requirements. It also shows you’re serious about safety.
Certification proves your equipment is safe and meets standards. It’s not just paperwork; it’s legal proof. Without current certification, your equipment shouldn’t be used for lifting.
The certification process starts with a thorough inspection and test. Only equipment that passes gets certified. The certification tags show that the equipment is safe and compliant.
Certification tags include important information such as:
Certification periods match the testing intervals. Marine environments might need shorter periods due to faster corrosion. Always check the certification before using the equipment and never use expired gear.
Equipment must be tested and certified according to manufacturer and regulatory standards. Professional services ensure this warranty is valid. They also help you understand what actions might void warranties, protecting your investment.
Call us on 07 3899 2933 to schedule your certification inspections and discuss your specific compliance requirements. Our experienced team understands marine applications and can guide you through the entire certification process.
Height safety equipment testing covers more than just lifting gear. It includes fall protection systems crucial in marine industries. Vessel maintenance, cargo operations, and shipboard access all involve working at heights.
Fall arrest systems include harnesses, lanyards, anchor points, and energy absorbers. Each part must be tested and certified to ensure the system works during a fall. A weak link in the system is dangerous.
Guardrails, walkways, and access platforms on vessels and maritime facilities also need regular checks. Corrosion affects these systems as much as lifting gear. Testing ensures they’re strong enough to prevent falls.
Testing and certification ensure your systems work well in harsh coastal environments. Experts find problems before they become serious. Regular checks prevent gradual damage that can lead to unexpected failures.
Professional testing services provide detailed reports that meet local and international standards. This comprehensive approach ensures your safety systems meet all requirements. It also shows you’re serious about protecting workers from falls.
For expert advice on your marine hardware testing needs, call us on 07 3899 2933. We’ll help you create a testing schedule that keeps you compliant without disrupting your work.
Even the best marine-grade hardware will show signs of wear. Catching these early can save lives. Your marine gear faces constant saltwater, sand, and UV damage in Australia’s harsh coastal areas.
Regular checks help spot problems before they’re dangerous. Knowing what to look for gives you confidence in making decisions. Knowing when to inspect yourself and when to call experts keeps your gear safe and compliant.
Surface pitting is a serious sign of corrosion on marine hardware. These small holes signal that corrosion has broken through the protective layer. Once pitting starts, it quickly gets worse and weakens your hardware.
Crevice corrosion shows up around gaskets and connection points. Look for dark stains or rust in these tight spots. This type of corrosion is dangerous because it’s often hidden until it’s too late.
Discoloration is a clue about your hardware’s health. “Tea staining” on stainless steel looks brownish and might seem cosmetic at first. But it can signal serious corrosion that needs attention.
It’s important to tell the difference between surface dirt and real corrosion. Rust on stainless steel might just be surface dirt. But white powdery deposits on aluminium mean active corrosion and need for replacement.
Hardware that bends or stretches under load is weakened and must be replaced. Deformation means the metal has gone past its elastic limit and won’t regain strength. Even slight bending can compromise safety.
Hairline cracks mean failure is near and often need a magnifying glass to see. These fine lines show metal fatigue has reached a critical point. Cracks usually start at stress points like corners and welds.
Metal fatigue builds up over time and is invisible until it fails suddenly. Waves and pressure weaken hardware through millions of cycles. Load history and service life are as important as visible signs during inspections.
Look for elongated holes or wear patterns that show excessive movement or loading. These signs mean your hardware has been overworked. Surface wear around connections suggests you might need to rethink your rigging.
Check for changes in surface texture or finish that might indicate stress. Stainless steel that looks rough and crystalline has likely been overloaded or damaged by heat. Any visible changes need further investigation before use.
Call professional inspection services right away if you see cracks, significant deformation, or corrosion that has caused material loss. These signs mean immediate safety risks that need expert evaluation. Don’t keep using questionable hardware until it’s checked.
Book professional load testing services brisbane before critical operations if your hardware hasn’t been tested in time. Regular testing ensures you meet Australian standards and safety regulations. Certified testing documents protect you legally and operationally.
Call for assessment after any incident involving shock loading or impact to your equipment. Events like dropped loads, vessel collisions, or extreme weather can cause hidden damage. Professional testing finds problems that visual checks can’t.
Reach out whenever you’re unsure about hardware condition or need help deciding on replacement. Our team offers expert assessment when you’re unsure about equipment serviceability. Call us on 07 3899 2933 for professional inspection that gives you peace of mind.
Load testing services brisbane can find problems invisible to the naked eye and provide the documentation you need. It’s always safer to be cautious with equipment that protects lives and valuable assets. Professional testing is cheaper than the risks of equipment failure.
Your marine hardware choice can make or break your equipment’s lifespan. Getting it right from the start saves you money and prevents failures. This is crucial for safety and efficiency.
Choosing quality materials like 316 stainless steel is key. Proper installation avoids galvanic issues. Regular checks and fresh water rinses keep everything running well.
Australia’s harsh environment tests every piece of equipment. Investing in marine-grade hardware saves money in the long run. It also means fewer emergency repairs and keeps people safe.
Fresh water rinses after saltwater exposure prevent corrosion. Scheduled inspections catch problems early, saving you money. These habits ensure your equipment works reliably.
Professional testing services check if your equipment meets safety standards. Lifting equipment certification brisbane ensures you’re compliant. For expert advice or to schedule testing, call us on 07 3899 2933.
Give your marine hardware the same care as your engines and navigation systems. Making smart choices today means reliable equipment tomorrow. Whether you manage vessels or maintain marina facilities, these tips keep your equipment in top shape.
Atlas Chains Brisbanes most trusted supplier of Lifting Equipment, Chains, Marine Applications.

Copyright © , Website design and hosting by Langford Consulting